Introduction
Creating a professional video requires more than simply picking up a camera and pressing the record button. A successful Plan a Video Shoot involves careful planning, creative development, technical preparation, production management, and post-production.Professional video production works even better when it is supported by a strong digital marketing strategy that helps businesses reach the right audience.
Whether you are creating a corporate video, social media Reel, promotional video, product video, YouTube video, advertisement, interview, or brand film, proper planning can save time, reduce production costs, and improve the final quality.
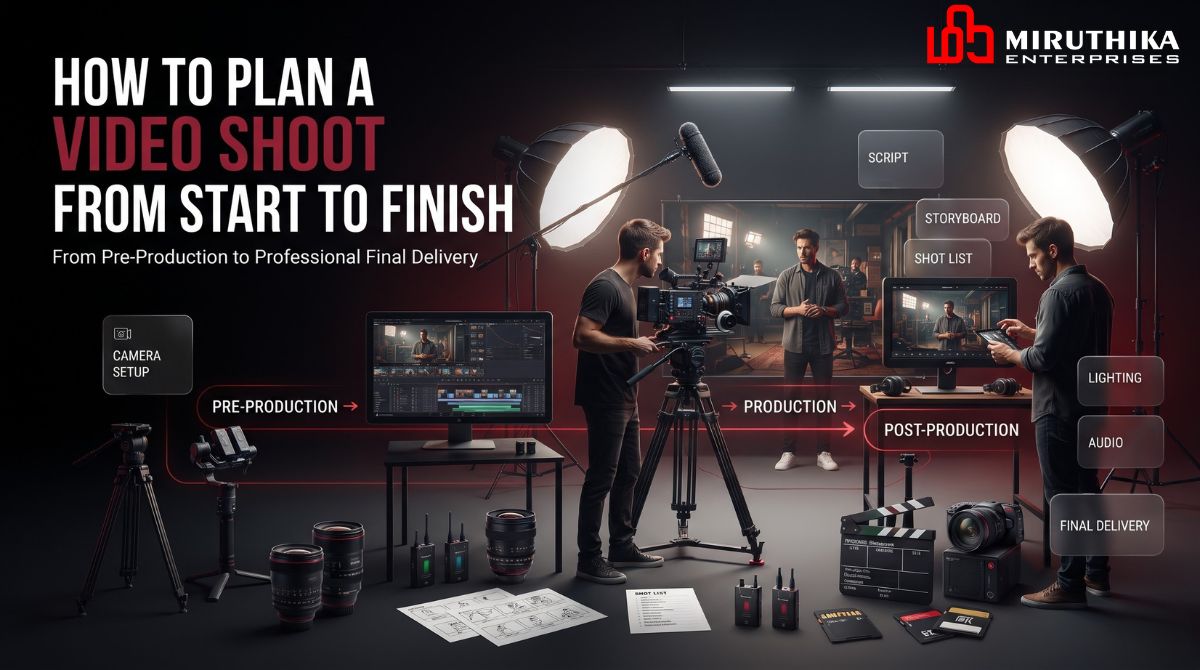
A well-organized Plan a Video Shoot production process typically moves through three major stages:
- Pre-production – Planning and preparation
- Production – Filming and recording
- Post-production – Editing and final delivery
This guide explains how to plan a video shoot from start to finish.
1. Define the Purpose of Your Video
Before planning cameras, locations, or equipment, determine why you are creating the video.
Ask yourself:
- What is the main purpose of the video?
- Who is the target audience?
- What message should viewers remember?
- Where will the video be published?
- What action should viewers take after watching?
Your objective could be:
- Brand awareness
- Product promotion
- Service introduction
- Customer education
- Social media marketing
- Lead generation
- Event promotion
- Corporate communication
- YouTube content
A clearly defined objective helps guide every other production decision.
2. Identify Your Target Audience
Understanding your audience helps determine the video’s style, tone, length, and message.
Consider:
- Age group
- Location
- Interests
- Professional background
- Problems they face
- Content they consume
- Preferred social media platforms
For example, a corporate video for business professionals may require a polished and informative style, while an Instagram Reel may need faster pacing and more visually engaging content.
3. Develop the Video Concept
Once the objective and audience are clear, develop the central concept.
A strong concept should answer:
What is the story?
What makes it interesting?
What should viewers feel or learn?
Your concept can be based on:
- Storytelling
- Product demonstration
- Customer experience
- Educational content
- Interview
- Behind-the-scenes footage
- Problem-and-solution format
- Before-and-after transformation
Keep the concept focused on one main message rather than trying to communicate too many ideas in one video.
4. Write the Script
A script provides structure for the entire shoot.
Depending on the video type, your script may include:
- Introduction
- Main message
- Dialogue
- Voice-over
- Product information
- Demonstration
- Call to action
- Closing statement
For short-form social media videos, keep the opening strong because the first few seconds are important for capturing attention.
A simple structure could be:
Hook → Problem → Solution → Benefits → Call to Action
5. Create a Storyboard
A storyboard visually represents how the video will look before filming begins.
Each scene can include:
- Shot description
- Camera angle
- Character position
- Dialogue
- Camera movement
- Lighting requirements
- Props
- Duration
A storyboard helps the production team understand exactly what needs to be filmed.
6. Prepare a Shot List
A shot list is one of the most useful production documents.
Instead of relying on memory, list every important shot required for the final edit.
For example:
| Shot | Description | Camera Angle | Location |
|---|---|---|---|
| 1 | Exterior building shot | Wide | Office |
| 2 | Employee working | Medium | Workspace |
| 3 | Product close-up | Close-up | Studio |
| 4 | Customer interaction | Medium | Reception |
| 5 | Product demonstration | Close-up | Workspace |
A detailed shot list helps prevent missing important footage.
7. Choose the Right Location
Location can significantly affect the quality of your video.
Consider:
- Lighting
- Background
- Noise levels
- Available space
- Power supply
- Accessibility
- Parking
- Weather conditions
- Permission requirements
For outdoor shoots, always consider backup locations in case weather conditions change.
8. Select Your Video Equipment
Choose equipment based on the type and scale of your production.
Common equipment includes:
Camera
Depending on your requirements, you may use:
- DSLR cameras
- Mirrorless cameras
- Cinema cameras
- Smartphones
Lenses
Different lenses create different visual effects.
Common options include:
- Wide-angle lenses
- Standard lenses
- Telephoto lenses
- Macro lenses
Tripod and Stabilization
Use:
- Tripods
- Gimbals
- Monopods
- Sliders
to achieve stable footage.
9. Plan Your Lighting
Good lighting can dramatically improve video quality.
Common lighting setups include:
Key Light
The primary light source illuminating the subject.
Fill Light
Reduces harsh shadows created by the key light.
Backlight
Separates the subject from the background and creates depth.
For professional shoots, test your lighting before recording the actual footage.
10. Plan Your Audio
Poor audio can make even a visually impressive video feel unprofessional.
Depending on the production, you may use:
- Lavalier microphones
- Shotgun microphones
- Wireless microphones
- Boom microphones
- External audio recorders
Before filming, check:
- Microphone connection
- Battery levels
- Recording levels
- Background noise
- Wind protection
Always record a short test before starting the main shoot.
11. Prepare Props and Visual Assets
Create a checklist of everything required for the shoot.
This may include:
- Products
- Packaging
- Documents
- Computers
- Smartphones
- Branding materials
- Furniture
- Clothing
- Promotional materials
Preparing these items in advance prevents unnecessary delays on production day.
12. Plan the Production Schedule
Create a realistic schedule for the shoot.
Include:
- Arrival time
- Equipment setup
- Lighting setup
- Makeup and wardrobe
- Rehearsal
- Filming
- Breaks
- Location changes
- Equipment packing
Group scenes by location whenever possible.
This reduces unnecessary travel and setup time.
13. Build a Production Team
The size of your team depends on the complexity of the project.
A production may require:
- Producer
- Director
- Cinematographer
- Camera operator
- Lighting technician
- Sound technician
- Production assistant
- Makeup artist
- Stylist
- Editor
For smaller projects, one person may handle multiple responsibilities.
14. Prepare the Talent
If people are appearing in the video, prepare them before filming.
Provide:
- Script
- Shooting schedule
- Wardrobe guidelines
- Location details
- Arrival time
- Performance instructions
Give talent enough time to rehearse important dialogue before recording.
15. Check Everything Before Shooting
Before the camera starts rolling, complete a technical checklist.
Camera Checklist
- Battery charged
- Memory cards available
- Lens cleaned
- Resolution selected
- Frame rate selected
- Exposure checked
- White balance checked
Audio Checklist
- Microphone connected
- Audio levels tested
- Backup recording available
- Background noise checked
Lighting Checklist
- Lights positioned
- Exposure checked
- Shadows controlled
- Background lighting tested
A pre-shoot checklist can prevent major problems later.
16. Start With Test Shots
Do not immediately begin recording the final take.
Record a few test shots and review:
- Framing
- Exposure
- Focus
- Lighting
- Audio
- Background
- Performance
Fix issues before shooting the main footage.
17. Capture Multiple Takes
Even experienced performers and production teams sometimes need multiple takes.
Record additional takes when:
- Dialogue is incorrect
- Focus is missed
- Audio contains noise
- Someone looks away
- Camera movement is imperfect
- Lighting changes
Having multiple takes gives the editor more options during post-production.
18. Capture B-Roll Footage
B-roll is additional footage used to support the main story.
Examples include:
- Product close-ups
- Office environment
- Employees working
- Hands using a product
- Equipment details
- Customer interactions
- Exterior building shots
- Close-up details
B-roll makes videos more visually interesting and helps editors create smoother transitions.
19. Organize Your Footage
After filming, organize all files immediately.
Create folders such as:
Project Name
- Camera Footage
- Audio
- B-Roll
- Images
- Graphics
- Music
- Voice-Over
- Project Files
- Exports
Rename important files clearly and maintain backups.
20. Begin the Editing Process
Post-production begins after filming is complete.
The editing process generally includes:
- Importing footage
- Organizing clips
- Selecting the best takes
- Creating a rough cut
- Adding B-roll
- Editing audio
- Adding music
- Adding graphics
- Color correction
- Final review
Popular editing software includes professional tools such as Adobe Premiere Pro, DaVinci Resolve, and Final Cut Pro.
21. Add Music and Sound Effects
Music can influence the emotional tone of a video.
Choose music that matches:
- Brand personality
- Video purpose
- Target audience
- Storytelling style
Also consider sound effects for:
- Transitions
- Product interactions
- Motion graphics
- Visual emphasis
Make sure music does not overpower dialogue or voice-over.
22. Apply Color Correction and Color Grading
Color correction ensures that footage has consistent exposure and color.
Color grading can then establish a particular visual style.
For example:
- Corporate videos may use clean and natural colors.
- Product advertisements may use high-contrast visuals.
- Lifestyle videos may use warm tones.
- Technology videos may use cooler tones.
Consistent color treatment creates a more professional final product.
23. Add Branding Elements
Include relevant branding elements such as:
- Logo
- Brand colors
- Typography
- Lower thirds
- Intro animation
- Outro
- Website
- Contact information
- Call-to-action
Avoid overusing branding elements. The design should support the story rather than distract viewers.
24. Optimize the Video for Each Platform
Different platforms have different requirements.
Instagram and TikTok
Vertical videos such as 9:16 are commonly used for Reels and short-form content.
YouTube
Landscape 16:9 is widely used for standard videos.
Both landscape and vertical formats can be used depending on the content.
Create platform-specific versions when necessary rather than simply uploading the same video everywhere.
25. Review the Final Video
Before publishing, watch the complete video from beginning to end.
Check:
- Spelling
- Audio quality
- Video quality
- Branding
- Transitions
- Captions
- Website links
- Contact details
- Call-to-action
- Background music
- Final frame
It is also useful to have another person review the video before publishing.
26. Publish and Promote the Video
Publishing is not the end of the process.
Promote your video through:
- Social media
- Website
- Email marketing
- Blog posts
- YouTube
- Paid advertising
- Online communities
Create supporting content such as short clips, quotes, images, and behind-the-scenes posts to extend the video’s reach.
27. Measure Video Performance
After publishing, monitor performance.
Important metrics include:
- Views
- Watch time
- Average view duration
- Engagement
- Shares
- Comments
- Click-through rate
- Website traffic
- Leads
- Conversions
Use these insights to understand what worked and improve future productions.
Common Video Production Mistakes to Avoid
Avoid these common mistakes:
- Starting without a clear objective
- Not writing a script
- Skipping the storyboard
- Forgetting important shots
- Poor audio recording
- Insufficient lighting
- Not checking equipment
- Shooting without a schedule
- Failing to capture B-roll
- Not backing up footage
- Ignoring platform requirements
- Overusing transitions
- Publishing without reviewing the final video
Good preparation can prevent many of these problems.
Complete Video Shoot Checklist
Pre-Production
- Define objective
- Identify target audience
- Develop concept
- Write script
- Create storyboard
- Prepare shot list
- Select location
- Arrange equipment
- Prepare talent
- Create production schedule
Production
- Set up camera
- Test lighting
- Test audio
- Record test shots
- Capture primary footage
- Capture multiple takes
- Record B-roll
- Review important footage
- Back up files
Post-Production
- Organize footage
- Edit video
- Add B-roll
- Edit audio
- Add music
- Add graphics
- Apply color correction
- Add branding
- Export final video
- Review quality
- Create platform-specific versions
Promotion
- Publish video
- Share on social media
- Create short clips
- Add to website
- Promote through email
- Monitor analytics
Conclusion
Planning a video shoot from start to finish requires a structured approach. The quality of the final video depends not only on the camera and equipment but also on the preparation that happens before filming.
By defining your objective, developing a strong concept, creating a script and storyboard, preparing equipment, organizing the production schedule, capturing quality footage, and following a structured editing process, you can create professional videos more efficiently.
Whether you’re producing a corporate video, product advertisement, YouTube video, social media Reel, interview, or promotional campaign, proper planning helps reduce mistakes, save time, control costs, and deliver a stronger final result.
The most successful video productions are built on one simple principle: plan carefully before you press record.
About the Author